Linkert Carburetor Tear Down and Rebuild
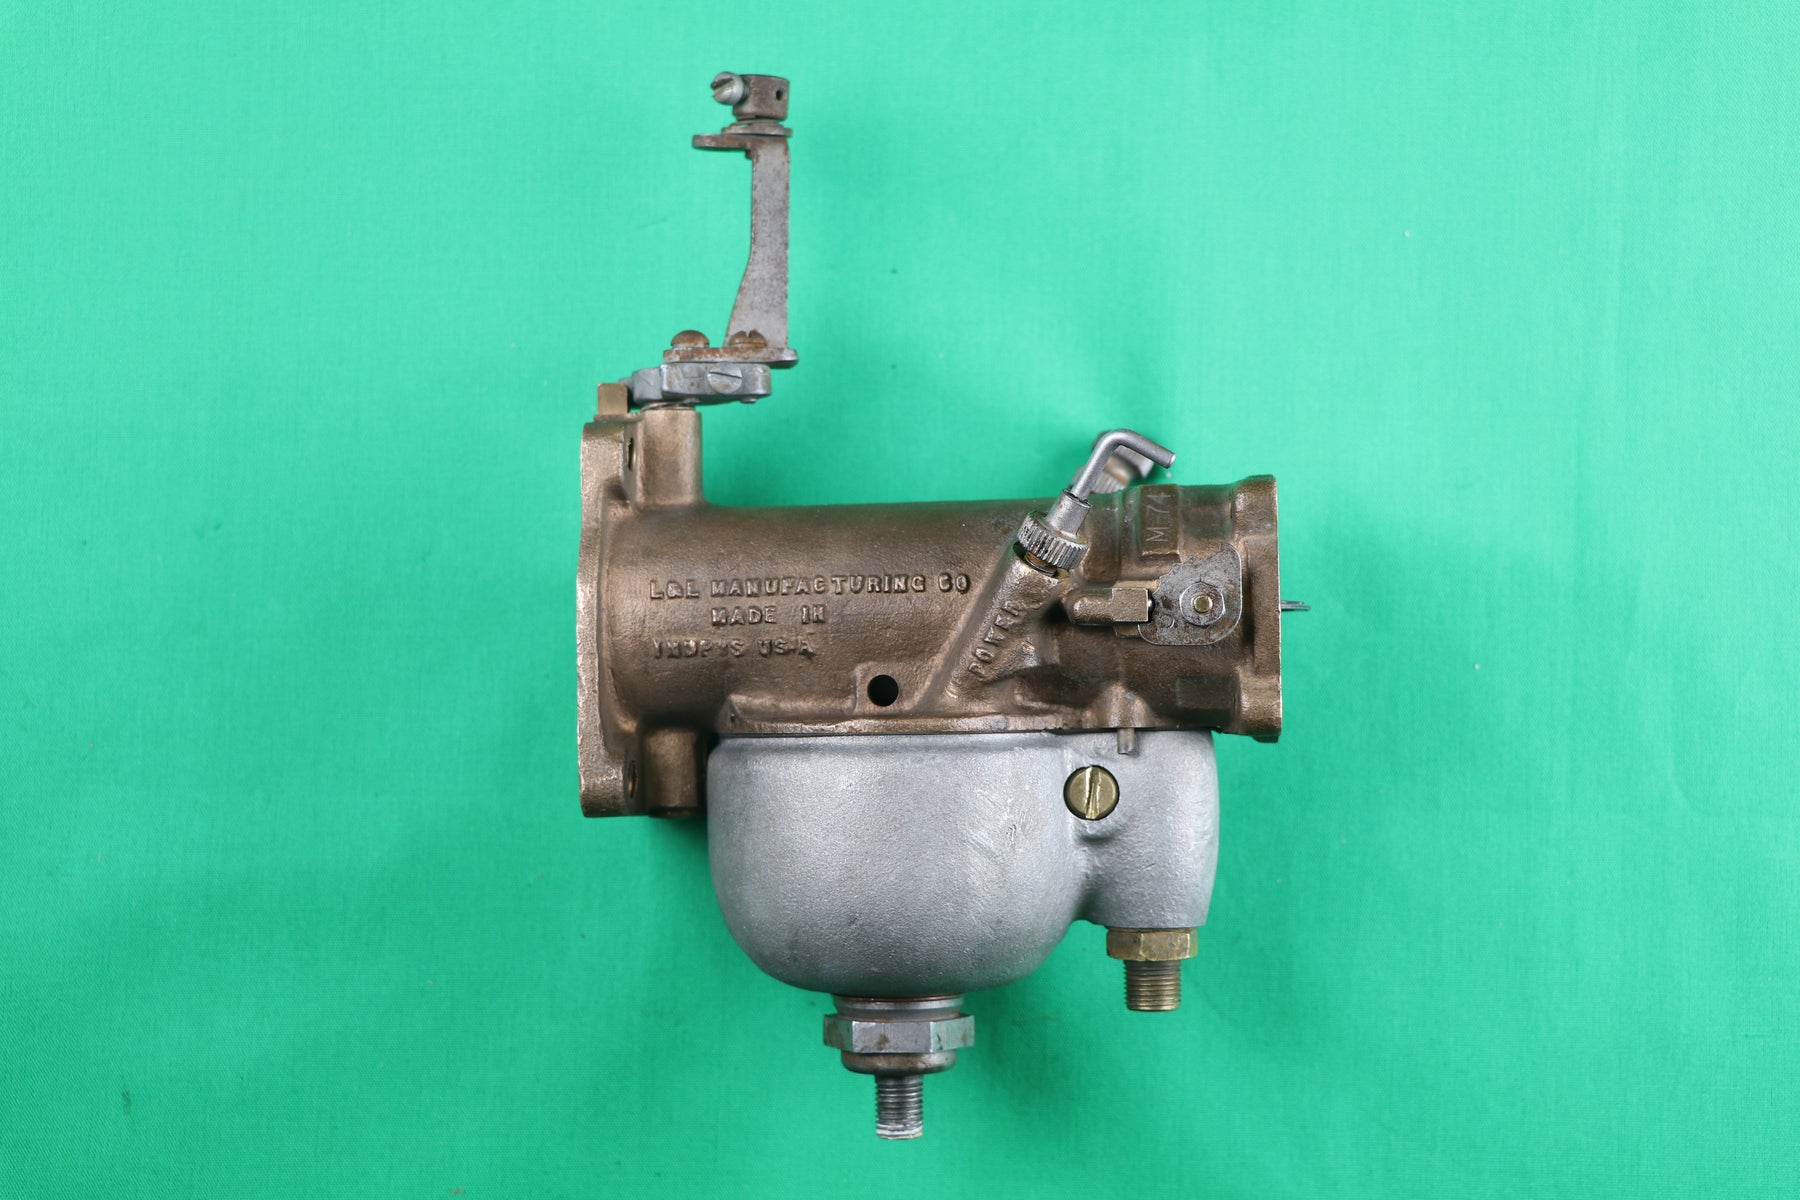
In 1933, Harley-Davidson switched from Schebler carburetors to the Linkert M-series carburetor produced by L&L Manufacturing in Indianapolis, IN. For the next 32 years, Harley would use various Linkert carburetors on all their production motorcycles, from flatheads to Knuckleheads to Panheads. If you have a pre-1965 Harley, chances are it left the factory with a Linkert carburetor installed on it.
Unlike most modern carburetors that are filled with various rubber diaphragms, O-rings and gaskets that breakdown over time, Linkert M-series carburetors are made almost entirely with metal components. This means that “rebuilding” a Linkert can be as easy as just giving it a thorough cleaning. It is recommended that if yours still uses the original brass floats that you upgrade to a “Rubber Ducky” float which is made to work with modern fuels. Otherwise, all the other components will work with any type of fuel. Replacement parts are readily available whether you want to hunt down OEM pieces on eBay or just pick up new reproduction ones from Colony.
The carburetor used in this article is the M-74B, which was used on panheads from 1951 until 1965. It is important to note that although the tuning procedure is the same for all M-series carburetors, the initial carburetor settings discussed in this article are specific to the M-74B and that other M-series carburetors may use slightly different settings.
Tools and Supplies Needed:
- Flathead screwdriver
- 5/16” wrench
- 3/8” wrench
- 5/8” wrench
- 1” wrench
- Small ruler
- Carburetor Cleaner
- Compressed Air
- EZ Turn Lubricant
- Bowl Gasket
- Lock Nut Gasket

Step 1: Use a flathead screwdriver to loosen the pinch screw on the throttle lever. Remove the throttle lever and the throttle shaft spring from the throttle shaft.

Step 2: Remove the low speed needle valve by screwing it counter clockwise and then sliding it out of the carb body.

Step 3: Remove the high speed needle valve by screwing it counter clockwise and then sliding it out of the carb body.

Step 4: Remove the air intake shaft nut using a 5/16” wrench. Slide the lock washer and the intake shaft stop off the air intake shaft. Gentle tap the carb body to remove the friction ball and spring.

Step 5: Remove the low speed needle valve lever screw using a 3/8” wrench, also remove the needle valve lever, spring and collar.

Step 6: Remove the two screws holding the air intake disc to the air intake shaft using a flathead screwdriver.

Step 7: Slide the air intake disc out of the air intake shaft.

Step 8: Slide the air intake shaft out of the carb body.

Step 9: Remove the two screws holding the throttle disc to the throttle shaft using a flathead screwdriver.

Step 10: Slide the throttle disc out of the throttle shaft.

Step 11: Slide the throttle shaft out of the carb body.

Step 12: Remove the idle hole body plug using a flathead screwdriver.

Step 13: Remove the idle passage plug screw using a flathead screwdriver.

Step 14: Remove the second idle passage plug screw using a flathead screwdriver.

Step 15: Remove the float valve seat using a 5/8” wrench.

Step 16: Remove the bowl lock nut using a 1” wrench. Slide off the copper lock nut gasket and remove the float bowl from the carb body.

Step 17: Remove the third idle passage plug screw and the fixed jet using a flathead screwdriver.

Step 18: Slide the main nozzle retainer spring and the main nozzle out of the carb body.

Step 19: Slide the venturi out of the carb body.

Step 20: Remove the float lever pin using a flathead screwdriver.

Step 21: Remove the float screw with a flathead screwdriver. Remove the float, float lever and float valve from the bowl.

Step 22: Soak all parts in carb cleaner and blow out the carb body using compressed air. Inspect parts for wear, replace any worn or missing parts.

Step 23: Reinstall all three idle passage plug screws, the idle hole body plug and the fixed jet using a flathead screwdriver. Remember that the fixed jet goes in the hole adjacent to the high speed needle valve.

Step 24: Coat both ends of the throttle shaft with EZ Turn Lubricant and reinsert into the carb body from the bottom.
Note: Make sure to check that this shaft does not have excessive side to side play. The shaft rotates on two metal bushings which can wear to the point that air can leak around the shaft, making tuning difficult. Worn bushings can be drilled out and replacement bushing can be pressed back into the carb body using specialty tools.

Step 25: Slide the throttle disc back into the throttle shaft and reinstall throttle shaft screws using a flathead screwdriver. Rotate the throttle shaft to make sure that the throttle disc does not bind and closes completely. You may need to loosen the throttle shaft screws and adjust the position of the throttle disc to achieve correct operation.

Step 26: Insert the venturi back into the carb body, making sure to line up the hole in the bottom of the venturi with the corresponding hole in the carb body for the main nozzle.

Step 27: Coat both ends of the air intake shaft with EZ Turn Lubricant and insert into the carb body.

Step 28: Slide the air intake disc back into the air intake shaft and reinstall air intake shaft screws using a flathead screwdriver. Rotate the air intake shaft to make sure that the air intake disc does not bind and closes completely. You may need to loosen the air intake shaft screws and adjust the position of the air intake disc to achieve correct operation.

Step 29: Insert the friction spring and friction ball into the carb body.

Step 30: Reinstall the air intake shaft stop on the air intake shaft and secure with the air intake shaft nut and washer using a 5/16” wrench.

Step 31: Reinstall the lever spring collar, needle valve lever spring and needle valve lever and secure with the needle valve lever screw using a 3/8” wrench.

Step 32: Reinstall the high speed needle valve, turning it clockwise until it seats. Then back the high speed needle valve out 2 turns for the initial setting.

Step 33: Reinstall the low speed needle valve, turning it clockwise until it seats. Then back the low speed needle valve out 5 turns for the initial setting.

Step 34: Reinstall the throttle shaft spring onto the end of the throttle shaft before sliding the throttle lever onto the throttle shaft. Position the throttle lever so that the throttle disc is completely open when the throttle lever is against the throttle stop. Tighten the throttle lever pinch screw with a flathead screwdriver. The throttle lever and shaft should open and close with just a slight drag. If too loose, loosen the pinch screw, compress the parts on the throttle shaft by hand and retighten.

Step 35: Reinsert the main nozzle into the carb body, making sure it extends through the venturi and into the carb throat.
Pro Tip: Install the main nozzle retainer spring and bowl lock nut to keep the main nozzle in place while you are setting up the float bowl.

Step 36: Reinstall the float valve seat and float valve seat gasket using a 5/8” wrench.

Step 37: Insert the float valve into the float valve seat and reinstall the float lever making sure that the float valve and float lever are connected. Insert the float lever pin into the side of the bowl and tighten using a flathead screwdriver.

Step 38: Reinstall the float and float screw using a flat head screwdriver. Adjust the float so that when the float valve is closed, the end of the float is ¼” from the top edge of the bowl. The float should also be positioned 3/64” to 1/16” off center (toward the top of the picture above).
Note: Before continuing, invert the bowl and apply suction to the bottom of the float valve seat. If there are any air leaks, you can use toothpaste to lap the float valve and float valve seat together or just replace both pieces with new.

Step 39: Install a new bowl gasket and slide the bowl back onto the carb body. Insert the main nozzle retainer spring and a new copper lock nut gasket before securing the bowl with the bowl lock nut using a 1” wrench.
Note: Invert the fully assembled carb multiple times, making sure that you can hear the float moving up and down. If the float is not angled correctly, it will get hung on the carburetor body. Remove bowl and adjust float angle to achieve smooth operation.
Initial Tuning: Once you’ve rebuilt the carburetor and reinstalled it on your motorcycle, you’ll need to adjust your low and high speed needle valves. Based on the initial settings described above, your engine will be running rich, but should allow the motorcycle to run. Crank the motorcycle and warm up the engine, a quick 5 mile ride is a good way to insure the motorcycle has reached operating temperature. Make sure that the timing is fully advanced and that the idle is set correctly before attempting any mixture adjustments. Next slowly turn the low speed needle valve clockwise until the motor starts to miss or run rough. At this point turn the needle back out (counter clockwise) 5 to 10 clicks to achieve the proper low speed mixture. If the idle speed has changed, readjust the throttle lever stop screw to bring the idle back to the correct speed. The high speed needle valve normally does not require additional adjustment, unless running at higher altitudes, although based on other modifications to your motorcycle, it may need to be adjusted one or two clicks from the stock setting. After you have adjusted the carburetor and the motorcycle is running smoothly, it is always worthwhile to remove the spark plugs to verify that your mixture is correct. A properly tuned engine will have spark plugs that have brown to greyish tan electrodes.